

Taking pictures in the daylight or under a direct light source is a daunting challenge in itself, which not only raises the brightness but also dissolves the captured details.
The picture will look faded with no sharpness, and every color seems to merge with the others.
If you want to sort it out, we have the solution.
Through this tutorial, I will explain the most popular and trusted methods for how to fix overexposed photos. Also, some hacks and tricks will be stuffed between the discussions to help you imbibe the nitty-gritty faster.
What is an Overexposed Photo?
An overexposed photo is a photo with too much brightness or contrast, causing it to lose its intricate detailing.
It can be better understood by learning the definition of exposure in photography, which is defined by Adobe as “ the amount of light that reaches your camera’s sensor, creating visual data over a period of time.”
This clearly mentions that the device used to take pictures is the main cause of over- and underexposure, i.e., it is a fault in the camera.
Here is an example of it.
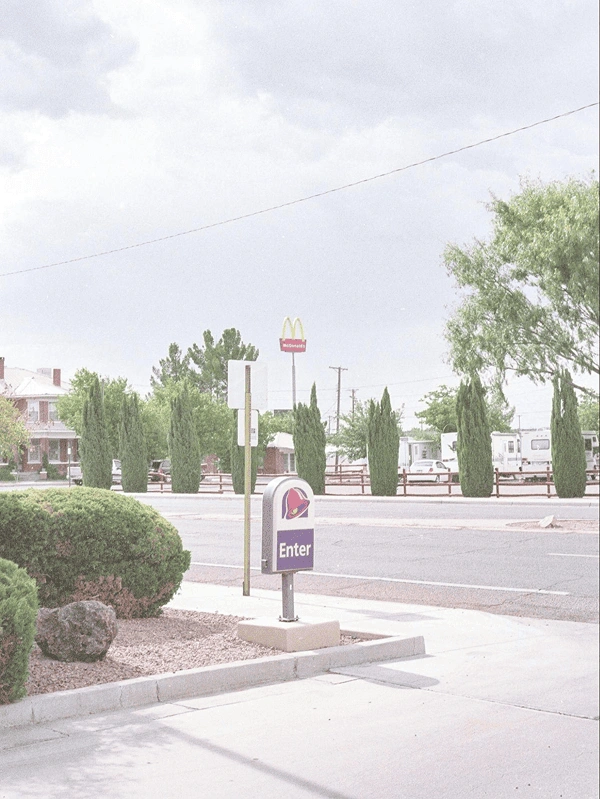
In the above picture, you might understand the crux and content, but the sharpness is missing, the colors look amalgamating with each other, and the shadows are almost invisible.
The need for the fixes depends on the level of damage inflicted on the image.
- Mild Overexposure: It has a few bright areas and requires simple fixes.
- Moderate Overexposure: These photos have significant overexposed areas, reducing the detail.
- Extensive Overexposure: Completely washes out the colour intensity of the image.
Here, the key driving factors are what Adobe has called the exposure triangle, consisting of:
- Shutter Speed: The time the shutter of the camera remains open.
- Aperture: Opening through which the light enters the camera.
- ISO: It means “International Organization for Standardization,” which measures the sensitivity of the camera to light.
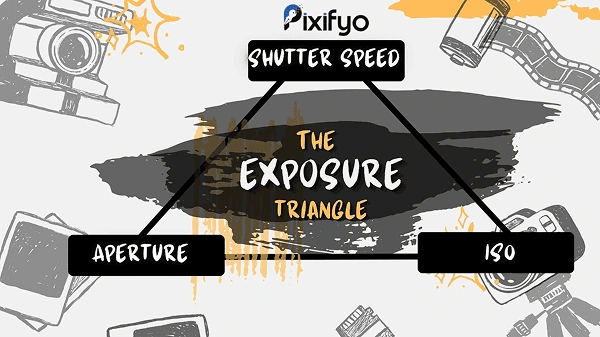
Balancing the exposure is done before and after taking the picture. These methods require superficial conceptual knowledge and some basic tweaks.
Also Read: What is the Brand Design Process? Learn with Examples And Suggestions
How to Fix Overexposed Photos?
To fix overexposed photos, you can either pay attention to fundamentals during the photo-taking process or make smart edits in the overexposed pictures later.
We will discuss both these dimensions in this discussion.
1. Use Adobe LightRoom
Fixing overexposed photos through programs requires basic photo editing techniques. Let me explain to you with the help of Adobe Lightroom.
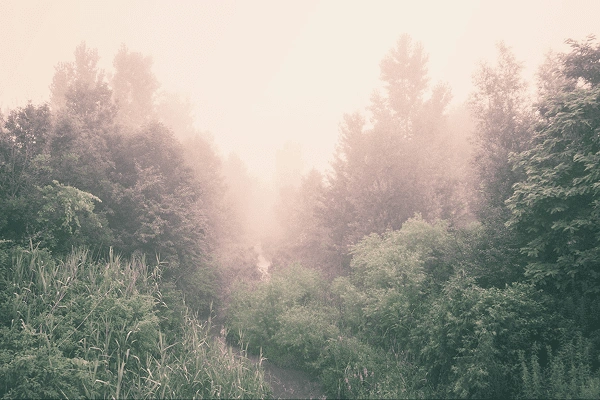
Firstly, open Lightroom and import your picture. Here I am taking a sample overexposed picture provided below.
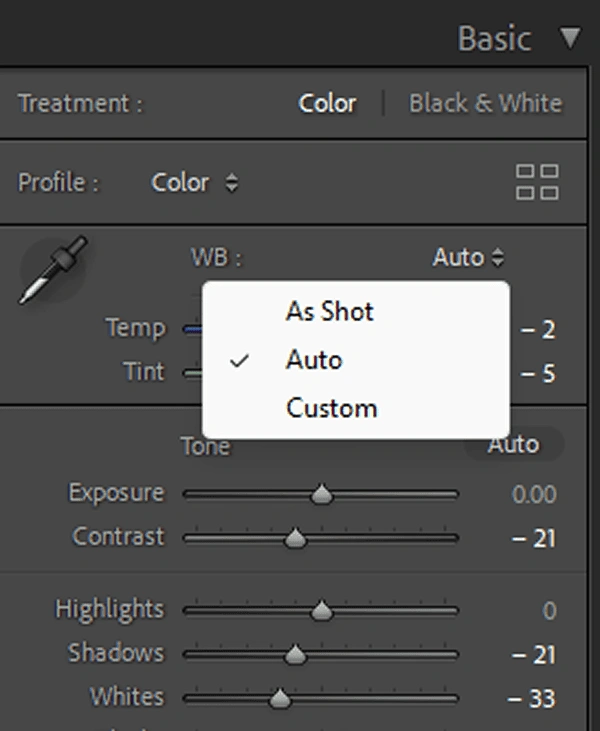
- Firstly, go to the “Basic” on the right side of the interface and select “Auto” from the drop-down.
- Now, click on the “Develop” tab in the top right corner and go to the “Tone Panel,” and you will see a straight, tilted line leaning on the right side. Just make some tweaks in it to come up with the right tone, as I have done.
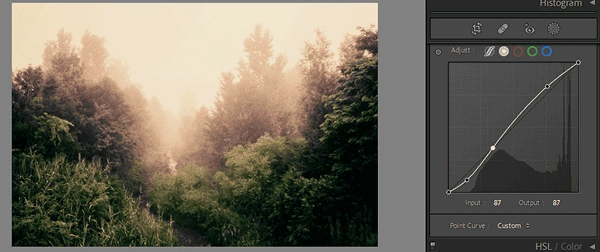
Now you can see that the vegetation on both sides is appearing clearer.
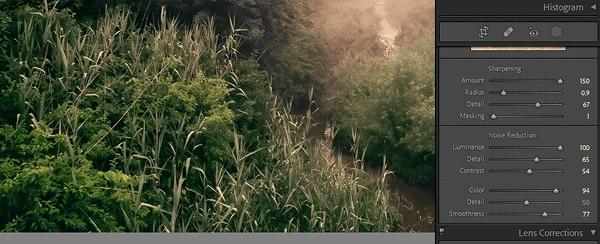
- Go down and click on the “Detail” section. Make changes in the sharpening, noise reduction, and color bars to reduce the exposure of the picture.
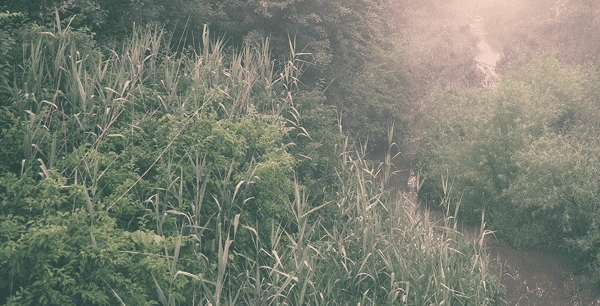
I have made some changes in the bars and see how perfectly the grass is appearing now.
And earlier it was like this.
- Next comes the “Lens Correction” below the Details. You will get ample options like Apple, Google Pro, Nixon, etc. Just try anyone and modify. I would suggest you choose Nikon or Canon.
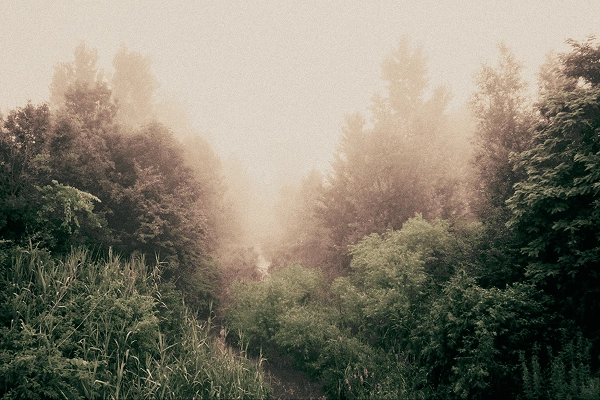
The final output we came up with is:
Pixifyo Pro Tips: You will get different tools and options in different programs. Just import the picture and start exploring which settings bring you the picture you have in your mind.
2. Use Adobe Photoshop
Like Adobe Lightroom, you can also get similar options in Photoshop as well.
- Go to Brightness and Contrast on the right side of the Photoshop interface to make the colors more distinct.
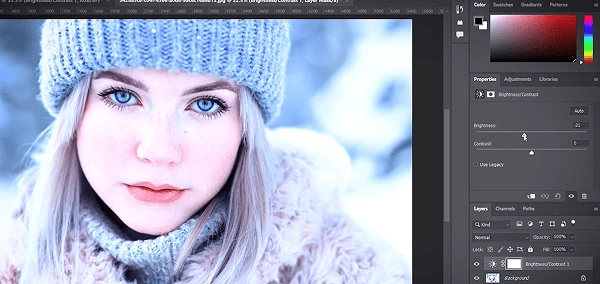
- You can also right-click the Brightness Layer in the bottom right corner and select “Blending Options.”
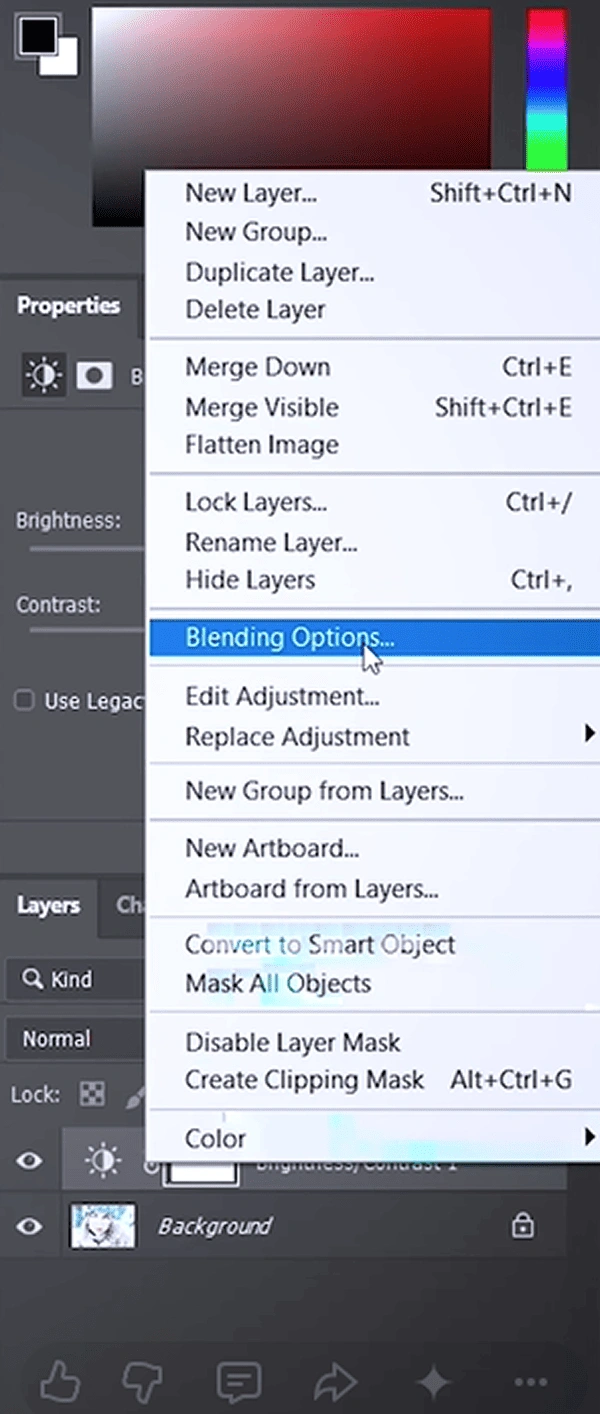
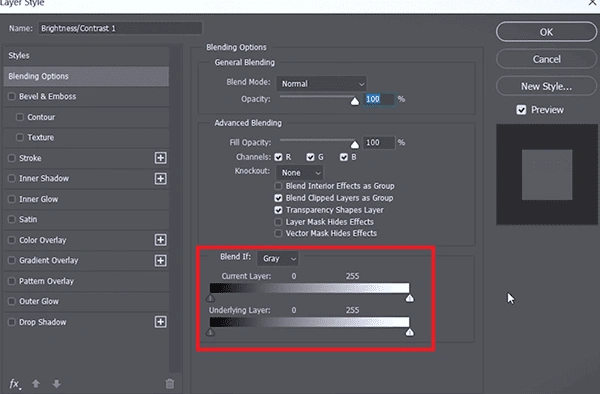
Now try adjusting the bars to see which pattern reduces the exposure of the picture.
3. Apply Program Filters
Many photo editing software programs come with certain preset filters, which you just need to drag and drop on the picture to get the required output. The gradient filters in Photoshop are a magnificent tool worth mentioning here. Linear gradient, angle gradient, and radial gradients are some of its examples, which you can use here.
4. Installing ND (Neutral Density) Camera Filters
Adding a neutral density camera filter before taking a picture optimizes the light exposure, thus fixing the overexposed photography before it appears. You can go with any of the best-selling options like Freewell, NiSi True Color, or K&F.
5. Through Camera Settings
Preventing overexposure is just an interplay between the camera settings. Here are the key suggestions for it.
- Reduce shutter speed to let the release light enter.
- Set the small aperture to allow less light to enter the lens.
- Lower ISO will reduce the sensitivity to light.
Many cameras come with exposure compensation settings, which simplifies overexposure issues in the photos.
6. Bracketing
Bracketing means taking the same shot with the same angle and position but with different camera settings. It works like a trial-and-error method where you click multiple pictures and choose one out of them, with the others serving as insurance.
Some cameras already have an automatic exposure bracketing (AEB) feature. You just need to press the shutter once, and the camera will capture the shot with different exposures. Go through the pictures later and choose the one you like.
Major Mistakes Committed While Fixing Overexposed Photos
There are certain situations when fixing the overexposure before or after taking the photo might further breed other picture-quality issues.
Here are 3 mistakes people generally commit and their solutions.
- Overdoing Editing: You might add more effects or make changes that further complicate fixing the picture quality issue.
Solution: Either hire a professional graphic designer or, first, make minor changes in the options you use on the programs and then increase them gradually.
- Committing Underexposure: While avoiding overexposure, you might obstruct the light so much that the picture will appear dark.
Solution: Adjust the shutter speed and aperture as per the level of light. You can also use an ND camera filter for it.
- Not Balancing The Subject and Background: Here, either the subject looks brighter, and the background appears darker, or vice versa.
Solution: Adjust the field of view of the camera to spread the light evenly and capture a balanced, lighted photo.
Can AI Fix Overexposed Photos?
Yes, you can fix overexposed photos with AI, but you need to have a general understanding of the characteristics of the features like brightness, tint, color gradient, or fundamentals of color theory to make expected changes.
Using AI for it has merits and demerits, which are discussed below.
The advantages of using AI to fix overexposed pictures are the following:
- Free or cheap alternatives
- Don’t require learning software or tools
- Quick results
On the flip side, there are some cons of using AI for it.
- Need clear and precise prompts, or else keep attempting multiple times.
- Can’t play with the graphs and histograms to find the right match of exposure.
- Need to buy credits or plan to edit more pictures, while programs like Adobe Lightroom are way cheaper.
Here, the smart decision is to outsource such tasks to some dependable partners like Pixifiyo photo editing service and get assurance of quality and punctual deliveries.
But if you want to do it yourself, I would suggest you adopt a Human-In-The-Loop approach, i.e., get an enhanced picture and give a final retouching to make it more appealing.
Conclusion
These methods and suggestions would have explained to you better how to fix overexposed photos. Firstly, try addressing it right when you are taking a photo. If the picture still looks overexposed, then go with the program to edit its characteristics. I would suggest you go with Adobe software, which might look hard to use at first but has been the best photo editing program till now.
Next Read: How to Trademark a Logo? Stepwise Process, Significance, and Much More
FAQs
Q1: Can an overexposed photo be fixed?
Yes, an overexposed photo can be fixed through photo editing tools, bracketing, using program filters, and ND camera filters.
Q2: What causes a photo to become overexposed?
Incorrect camera settings, such as a slow shutter speed, wide aperture, or high ISO, can cause a photo to become overexposed.
Q3: Can AI restore details in overexposed photos?
Yes, AI can restore details in overexposed photos up to a certain level. It can enhance the texture, color, and image quality and can also retrieve the lost details from the image that are barely perceivable.
Q4: Will fixing an overexposed photo reduce its quality?
No, fixing an overexposed photo when edited well won’t compromise the quality. However, overdoing the editing techniques might impact it negatively.
Q5: What is the best way to fix overexposed photos?
The best method to fix overexposed photos is to use programs like Adobe Lightroom or Photoshop. These days, some AI-backed platforms are also providing such services.
Q6: What is an ND filter?
ND (neutral density) camera filters are made of optical glass and are installed in front of the camera lens to adjust the light entering the lens.
Sources:
- Fix an overexposed photo by Adobe
- Overexposed Photos: How to Fix Them by Skylum
- How to Fix Overexposed Photos: A Simple Editing Guide for Beginners by Filmora