


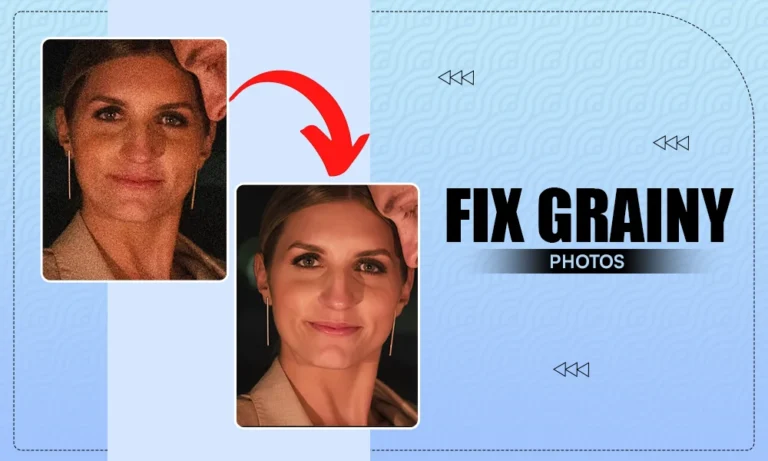
Taking pictures in the dark (low lighting) or when using an extremely high ISO are two of the most common pitfalls of taking pictures. This isn’t simply going to make the picture appear dark; rather, it’s going to break down the image into a speckled, textured mess.
You’ll get a very grainy-looking image that won’t have any smoothness to it. All of those flat surfaces, skin, sky, walls, etc., will begin to resemble sandpaper.
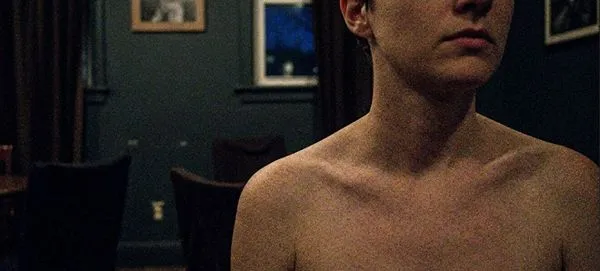
We can help you resolve the problem by providing one or more of several solutions. In this tutorial, we will describe how to fix grainy photos. In addition, there will be some “hacks” and “tricks” embedded within our discussion to enable you to quickly learn as many of the details as possible.
What is a Grainy Photo?
Grainy photographs are photos that have a rough, sandpaper-like (or speckly) appearance and irregular patches of brightness and color. The term for grainy photos is simply “noise” when discussing photography.
Adobe on noise states that noise occurs when a digital camera’s sensor is required to enlarge a weak electronic signal (most often caused by shooting in low-light conditions and using high ISO settings).
Understanding why this happens is the first step in learning how to fix grainy photos. The noise isn’t random, it’s a direct result of your camera’s settings and shooting conditions.
This shows that the device being used for taking photographs is the primary reason why there will be some degree of graininess in those images. Therefore, noise is created as a byproduct of the sensor being overworked.
Here is an example of it.
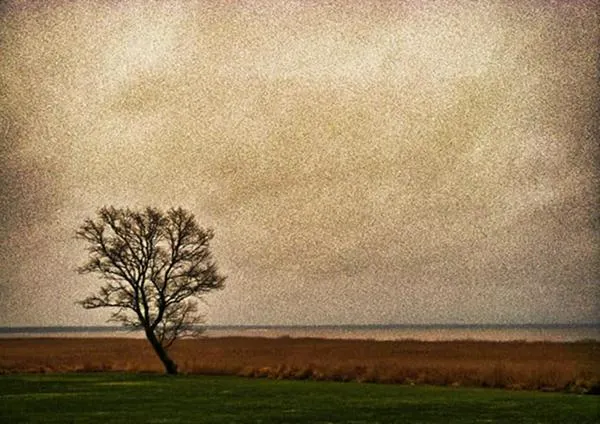
You may be able to see the grain or content of the photo in this example, but it lacks the smoothness. The sky and shadows appear gritty or as if they were made from sand, and it’s difficult to discern finer details.
Depending upon the amount of damage done to the photo, there could be an increased need for these corrections.
- Light Grain: A mild, uniform dotting throughout the image (the dots are typically most visible when closely inspected) requires minimal correction.
- Moderate Grain: Obvious speckling throughout shadowed and flat areas causes a loss of definition/clarity.
- Heavy Grain: Thick patches of both color and brightness “noise” dominate and completely obscure all detailed aspects of the image.
No matter which category your image falls into, there’s a way how to fix grainy pictures without starting the shot over. Here, the key driving factors are what Adobe has called the exposure triangle, consisting of:
- ISO: This represents the International Organization for Standardization. ISO defines how far your camera increases its sensor’s signal output.
Increased ISO = greater amplification = more noise
- Shutter Speed: This determines how long the camera’s shutter will remain open. Slower shutters allow more light into the camera, allowing you to use lower ISO values.
- Aperture: This refers to the opening through which light reaches your camera. Wider apertures (smaller f-numbers) allow more light into the camera, making fewer demands on the sensor.
Balancing these three settings is what keeps graininess in check before you even press the shutter. Fixing it after the fact requires some basic editing tweaks, which we’ll walk through next.
Also Read: What is User Interface Design? Types, Difference, Design Process, and More
How to Fix Grainy Photos with Editing Tools?
If the photo is already taken and already grainy, here’s how to fix grainy photos using software, Adobe Lightroom’s Denoise Tool, Adobe Photoshop’s Reduce Noise Filter, Adobe Photoshop’s Camera Raw Filter, and other third-party dedicated tools can help you de-grain your photo.
1. Use Adobe Lightroom’s Denoise Tool
Fixing grainy photos through programs requires basic photo editing techniques. Let me explain to you with the help of Adobe Lightroom.
- Firstly, open Lightroom and import your picture. Here I am taking a sample grainy picture provided below.
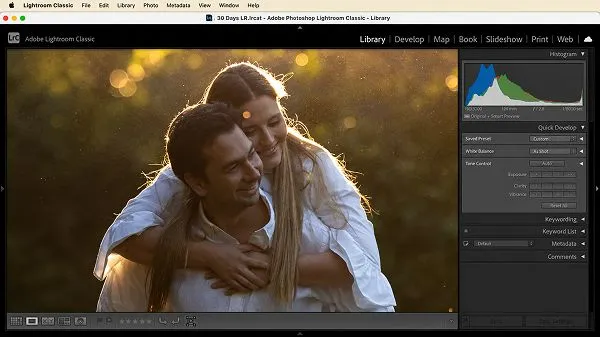
- Go to the “Develop” module and open the “Detail” panel on the right side of the interface.
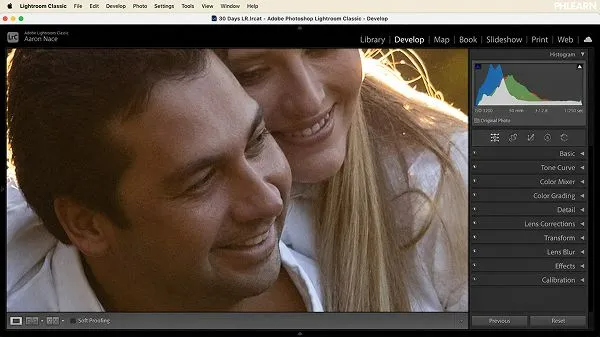
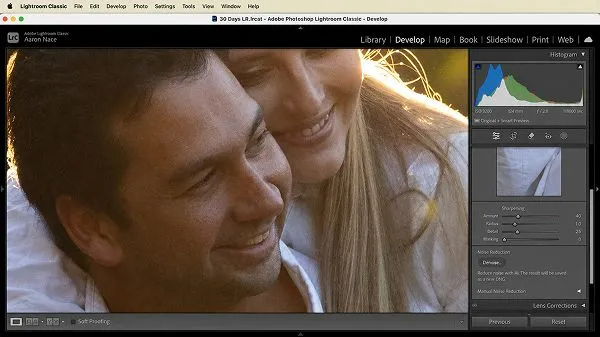
- Scroll down to the “Noise Reduction” section, and you will see a “Denoise” button sitting above the manual sliders.
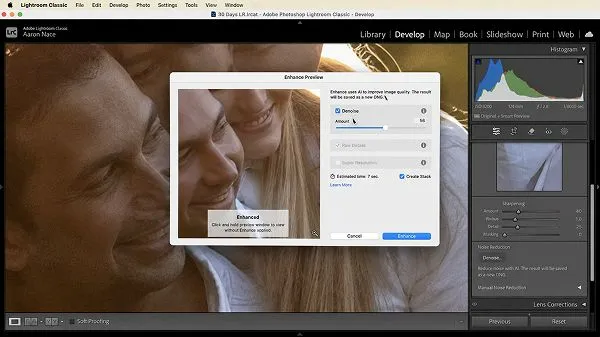
- Click “Denoise,” and an Enhance Preview window pops up with a single “Amount” slider, defaulted to 50-60. Drag it up if the photo is very noisy, or down if you want to keep more texture. Most photographers find that somewhere around 50 to 70 gives the cleanest result without a plastic look.
- Click “Enhance,” and Lightroom processes the photo in the background, saving it as a new DNG file right next to your original. This can take anywhere from a few seconds to a couple of minutes, depending on your computer’s GPU.
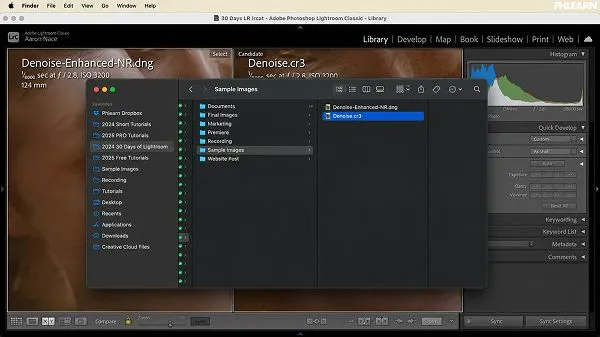
That’s really all it takes. This is one of the fastest ways how to fix grainy pictures if you’re already working in Lightroom.
Pixifyo Pro Tips: Only raw files (including a very small number of raw file alternatives like Apple ProRaw) can use Denoise. If your image is a JPEG, then find the manual noise reduction sliders at the bottom of this same panel (Luminance, Detail, Contrast, Color, Detail, and Smoothness), and pull the luminance slider up first because it specifically reduces sandy specks.
2. Use Adobe Photoshop’s Reduce Noise Filter
Like Adobe Lightroom, Photoshop also gives you a reliable way how to fix grainy photos through its built-in Reduce Noise filter.
- Go to “Filter.”
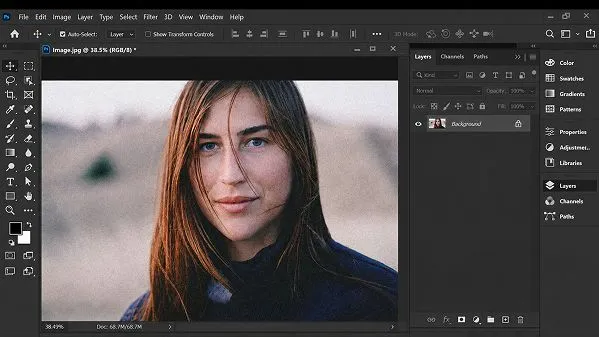
- Hover over “Noise,” and click “Reduce Noise” from the drop-down.
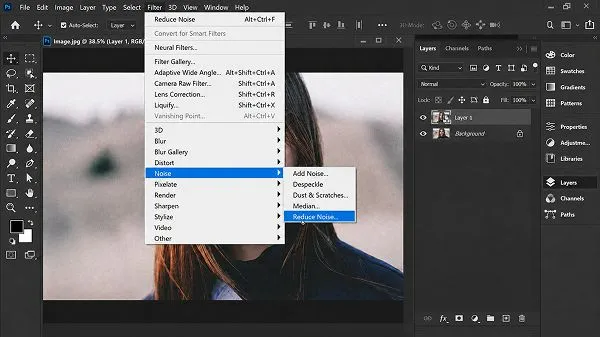
In the dialog box, start with the “Strength” slider at 0 and drag it right until the speckling clears up. If you have lost any sharpness in the process, then bring the “Preserve Details” slider up slowly.
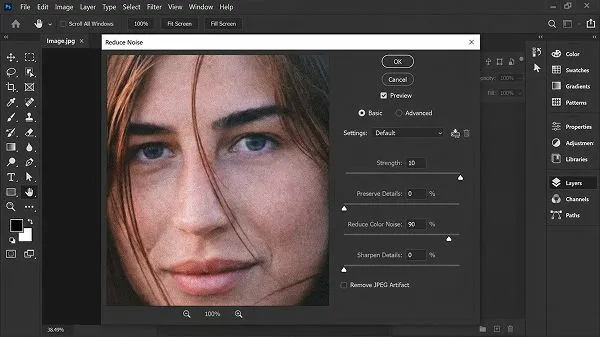
If you’re seeing colored specks rather than just gray ones, use the “Reduce Color Noise” slider as well, and finish with a light touch on “Sharpen Details” to bring edges back without reintroducing noise.
Pixifyo Pro Tips: If an area of your photo is noisier than another (such as a cloudy sky), go back into the “advanced” section of the same menu and adjust each individual color channel (red, green, blue) rather than adjusting the entire image using just one setting.
3. Try Adobe Photoshop’s Camera Raw Filter
When using RAW files in Photoshop, applying the Camera Raw Filter’s Manual Slider will typically provide softer results than using the standard “Reduce Noise” filter. To access these:
- Open the menu from “Filters” and select “Camera Raw Filter.”
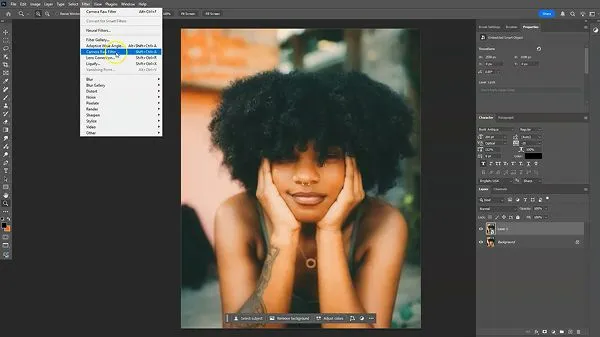
- Select the “Details” tab and set the “Color” slider to remove color noise.
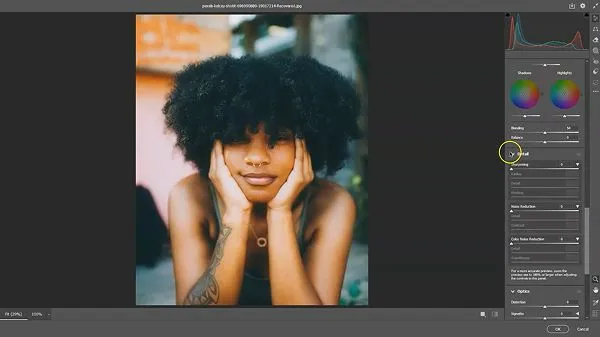
Like Lightroom’s Manual Sliders, this is also generally going to be less aggressive than Photoshop’s standard “Reduce Noise” filter.
4. Use a Dedicated Noise-Reduction Tool
Third-party applications for specific tasks, i.e., Topaz DeNoise and DxO PureRAW, were developed for use as dedicated noise reduction tools. These programs will have superior performance at extreme levels of noise, such as those associated with astrophotography or high ISO images, compared to a general-purpose editor.
If you’re dealing with extreme noise and want to know how to make grainy photos clear without losing fine detail, a dedicated tool like Topaz DeNoise will usually outperform a general editor
Before using advanced denoise tools, make sure to understand the fundamentals of basic photo editing that can improve overall image quality.
How to Fix Grainy Photos in the First Place?
To prevent grainy photos, shoot at a lower ISO, use a tripod in low light, and expose correctly the first time. No software needed, just better camera habits before you press the shutter.
1. Shoot at a Lower ISO
Reducing graininess is often based on the relationship of your camera’s settings. Below are some of the basic ways to do this.
Reduce the iso to the lowest setting possible while still allowing enough light into your camera. A high ISO is the number one source of digital noise. Open up the lens by using a lower f-number to allow more light to hit the sensor and, therefore, raise the ISO.
Slowing the shutter speed will also help to increase the amount of light into the camera. Just be prepared to hold the camera steady to avoid blurring the image.
2. Use a Tripod in Low Light
Using a tripod allows you to take longer exposures without camera shake, resulting in being able to keep your ISO lower in dim lighting conditions.
This is probably the best habit to develop when shooting images free from excessive grain, and it does cost money, but there is no reason why you have to buy another one; plus, it works all the time.
3. Expose Correctly the First Time (Avoid “Fixing It in Post”)
Shooting a photo underexposed and then brightening in post-production will result in much greater amounts of digital noise than if you had properly exposed your shot at the time of capture.
By underexposing your shot and then brightening in post-production, you are magnifying the amount of noise that was already present in your shadows.
To reduce grain and digital noise, aim to expose your shot properly in camera and particularly pay attention to your shadows before trying to recover them through editing software.
Also Read: What is the Brand Design Process? Learn with Examples And Suggestions
Can AI Fix Grainy Photos?
Yes, this does depend on what type of AI you are using. AI has become one of the more popular answers to how to fix grainy photos, but not all AI tools work the same way.
For example, general chatbot options (such as ChatGPT, Claude, and Gemini) will provide a nice-looking, cleaned-up version of your photo. However, these chatbots also do a form of ‘remake’ that may alter subtle elements such as people’s faces, hands, or other objects/text within an image, which could be problematic if accuracy matters.
However, purpose-built denoisers (for example, Lightroom’s Denoise and Topaz DeNoise) are designed specifically to remove noise from images while keeping accurate information about the original pixel data intact. Therefore, denoisers are generally better suited for applications requiring higher degrees of accuracy.
Conclusion
These tips and tools will help explain to you in greater detail how to improve your grainy pictures. First off, address this issue while you are shooting that picture. A low ISO number and steady shot are always going to be better than an editing trick.
If you see the picture still looks grainy after attempting to correct some of the issues above, go ahead and use the software to edit the picture. We would recommend using Adobe Lightroom’s Denoise Tool first because it is currently considered by many users to be one of the best tools for cleaning up noise from images while also preserving details.
Also Read: How to Trademark a Logo? Stepwise Process, Significance, and Much More
FAQs
Q1: Can a photo that has grain ever be repaired?
Yes, there are many tools to repair a grainy photo. Examples include Lightroom’s “Denoise,” Photoshop’s “Reduce Noise” filter, and third-party applications designed specifically for reducing noise.
Q2: Why does my photo appear grainy?
High ISO settings, low lighting conditions, and over/under exposure followed by adjustments to lighten a darkened area will typically create grain in your photos.
Q3: Is it possible to have AI remove grain from an image without affecting image detail?
Yes, using AI such as Lightroom’s Denoise function, you can remove a considerable portion of the grain in your images while maintaining much finer detail than older manual noise removal sliders. Results may still vary depending on the image.
Q4: Removing noise from an image reduces its quality, correct?
No, if removed properly. If you remove noise too aggressively, you may find that the softness of the image creates a plastic-type appearance.
Q5: How do I repair grainy images?
The best approach is to eliminate the problem of grain at the point of creation (i.e., shooting) by either lowering the ISO or using a tripod whenever possible. For any additional grain, use Lightroom’s Denoise or Photoshop’s Reduce Noise filter.
Sources:
- Enhance fine details in raw images | Lightroom Classic By Adobe
- Reducing Noise In Images With Photoshop By Photoshop Essentials